Sunday, December 20, 2009

Buckeyes

I have so many fond memories of making these with Grandma when I was younger!
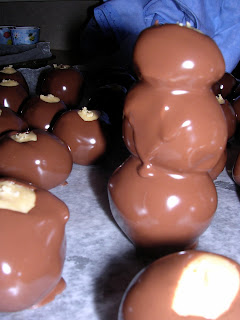
Fighting with my siblings and cousins over who gets to eat the 'snowmen'....
Dropping the WHOLE buckeye into the chocolate, then having to fish it out with a spoon....
Sneaking some when Grandma wasn't looking (just kidding Grandma! We would never do that. Ever.) ...
Hiding some in my bedroom so my brothers wouldn't eat them all...

...the more I think about it, the more I am amazed that Grandma was willing to do this with us (the cousins). Oh well, we did have loads of fun! And I'm assuming Grandma had fun too. We must have been pretty entertaining, at the very least.

This was my first time making these by myself, without Mama or Grandma doing the majority of the work. I was pretty nervous, and had a near mishap (for some reason, I first measured 3 cups of powdered sugar. If it's REALLY sticky and liquidy, you didn't add enough powdered sugar), but they turned out pretty well! I am quite proud of myself. :)

Grandma Mickey's Buckeyes


3 Pound powdered sugar
2 Pound peanut butter
1 Pound butter, softened
12 Ounce semisweet chocolate chips
12 Ounce milk chocolate chips
1 bar paraffin

Instructions:
Mix together powdered sugar, peanut butter, and butter. Roll into small balls; refrigerate overnight. (Or freeze for a couple hours.) Melt together chocolate chips and parrafin wax, preferably in a double boiler. Dip balls in chocolate mixture using toothpicks to spear. Drop on wax paper. Chill.


(Note how pretty mine are! And the snowmen. I LOVE making snowmen. Seriously, three buckeyes for one! WOOHOO!)

GRADUATION


So, not to toot my own horn or anything, but I (finally) graduated from college yesterday. (I say finally because the last 4 1/2 years have seemed like TWENTY.)
I earned my bachelor degree in health care systems administration, and I was SO excited to be done! We had a small get-together at the apartment afterwards... I forgot to get the camera out until after Uncle Rod & Aunt Joy left, but here are some pictures.

(The baby was definitely the center of attention for a lot of the time!)
(Nate & Kyle were teaching Jonah how to play Little Big Planet...)
(It is extremely hard to get both kids to look @ the camera!!)
(Now Kate is learning!)

Saturday, December 12, 2009

Peppered meatballs, and an update on the puppy

So, first of all, we've changed Georgie's name to Remus. We'll see how well he takes to his new name.... :)

This recipe was something I tried for dinner... and it was a little TOO peppery. Other than that, it was VERY good! So, we are adapting it for the next time!

It is very flavorful. All of the little ingredients really added to the flavor of the meatballs themselves, and the sauce was spectacular. I was concerned that there might be too much of the sour cream flavor, but that wasn't much of a problem at all.

No pictures though... so you'll just have to imagine what it looks like. :) (When we have the leftovers, I'll get a picture.)

Peppered Meatballs
(TOH)

1/2 Cup sour cream
2 Teaspoon Parmesan
1/2 Teaspoon pepper
1 Teaspoon salt
1 Teaspoon dry bread crumbs
1/2 Teaspoon garlic powder
1 1/2 Pound ground beef
sauce:
1 Cup sour cream
10.75 Ounce condensed cream of mushroom soup
2 Teaspoon dill weed
1/2 Teaspoon sugar
1/2 Teaspoon pepper
1/4 Teaspoon garlic powder

Instructions:
In a bowl, combine sour cream and Parmesan. Add pepper, salt, bread crumbs, and garlic powder. Crumble meat over mixture and mix well. Shape into 1" balls. Place in a greased baking pan. Bake at 350 for 20-25 minutes or until no longer pink.
Combine the sauce ingredients in a bowl.
Transfer meatballs to a slow cooker. Pour the sauce over the meatballs. Cover and cook on high for 2 hours or until heated through.

Serve over hot buttered noodles for a main course.

Yields: about 20 meatballs, 2 c sauce

Friday, December 11, 2009

GEORGIE!

If you weren't aware, I am graduating next week. (Which, if you've talked to me recently, would be hard not to be aware of, since it's one of the only things I can talk about lately.)
If you weren't aware, Christmas is in two weeks. (... I don't know how this could come as a surprise, given the stores have been advertising it for two months, and the fact that us Michiganders just got a couple truckloads of snow dumped on every square foot of the state.)

Due to these fantastic events, my husband decided I could have a dog for Christmas/graduation. (Seriously, isn't he the best husband EVER?)

I have been oogling over puppies/dogs on the shelter website for a few weeks, changing my mind every day or so on what adorable, sad-looking puppy I wanted. (Note that all dogs were being called puppies at this point.)

I convinced Nate last week that we should go to the shelter TODAY, the 11th, to get the puppy. We were originally thinking tomorrow (Saturday), but I want to go visit my parents Sunday, so we decided to give the dog time to get used to us and the house before took a road trip.


Last night, once last time, I checked out the shelter website. There were two VERY cute coonhounds there--a red, and a brown/black. The red was older (a few years?) and the black/brown was 4 months. A little younger than we wanted, but he just looked so SAD. I promised Nate I would consider all the puppies though!


When we got there, we saw the black/brown coonhound first. It was basically love at first sight! I wanted to take him home right away! He was super adorable, and so sweet! I checked out the other dogs (the red coonhound was gone), and I was slightly tempted by an adorable spaniel mix. He was very sweet too, but I had to take the hound. :)

His name is George, and he is the sweetest dog I've ever met. He is pretty shy, and was scared at first. He's quickly getting used to his new home though!

(Although he seems to be afraid of heights... won't go up or down our stairs, I've had to carry him every time. He's 40+ pounds, and just shakes in my arms. Tomorrow I'm going to try the trip w/ treats, and see how well that goes.)


And we are discovering he kinda snores... which actually just increases his adorable-ness right now!

Saturday, December 5, 2009

Ham-Stuffed Jumbo Shells

I've never made stuffed shells before, so this was interesting to me. As usual, I thought it had too much green pepper in it... I still haven't learned to like that stuff. :)

Probably wouldn't make this again--Nate wasn't fond of the green pepper-ham combo. Otherwise, I thought it was pretty good. Just need some alterations for next time! Cut out the green pepper, replace with something else maybe.

Ham-Stuffed Jumbo Shells
(TOH)


12 jumbo pasta shells
1 1/2 Tablespoon all purpose flour
1 Cup milk
1/4 Pound fresh mushrooms, chopped
1/4 Cup chopped onions
1/4 Cup chopped green pepper
1 Tablespoon canola oil
1 1/2 Cup cubed fully cooked ham
1 Cup shredded 4 cheese mexican cheese
1 1/2 Tablespoon grated parmesan
1/2 Teaspoon Parsley

Instructions:
Cook pasta according to package directions. Meanwhile, in a small saucepan, combine flour and milk until smooth. Bring to a boil; cook and stir for 2 minutes or until thickened. Remove from the heat; set aside.
In a large nonstick skillet, saute the mushrooms, onion, and green pepper in oil until tender. Reduce heat; add the ham, 1/2 cup cheese, and parmesan. Cook and stir until cheese is melted. Remove from the heat. Stir in 1/4 cup of the reserved sauce.
Drain pasta, stuff each shell with about 3 tbsp of filling. Place in an 8x8 baking dish coated with cooking spray. Top with remaining sauce. Cover and bake at 350 for 30 minutes or until heated through. Sprinkle with parsley, and remaining cheese.


Serves: 4
Serving Size: 3 stuffed shells
Yields: 12

Calories: 274
Cholesterol: 26 mg
Fat: 7 g
Saturated Fat: 2 g
Calories From Fat:
Protein: 23 g
Carbohydrates: 30 g
Sodium: 703 mg
Fiber: 2 g

Wednesday, December 2, 2009

Pizza!!

I love pizza. Love, love, love it! Granted, it's really not very good for me, so I try not to have it too much.

Nate loves having whole wheat crust, so I started using this recipe. I won't eat the crust around the edges--I think it's a little too dry. Other than that, I love this recipe. We changes the ingredients a lot, this is just what I used the last time. :)


Whole Wheat Pan Pizza
(Better Homes and Gardens Cookbook)

1 1/4 Cup all purpose flour
1 3/4 Cup whole wheat flour
2 1/4 Teaspoon active dry yeast
1/2 Teaspoon salt
1 Cup warm water (120-130 degrees)
2 Tablespoon cooking oil/olive oil
15 Ounce pizza sauce
1 Teaspoon pizza seasonings
4+ Cup mozzarella cheese, shredded
1 mushroom, cut into small pieces
1/2 Small onion, chopped finely
1/4 Cup ham, chopped
3 Ounce Pepperoni

Instructions:
In a large mixing bowl, combine the all-purpose flour, yeast, and salt; add warm water and oil. Beat with an electric mixer on low speed for 30 seconds, scraping bowl. Beat on high speed for 3 minutes. Using a wooden spoon, stir in as much of the whole wheat flour as you can.
Turn dough out on a lightly floured surface. Knead in enough remaining flour to make a moderately stiff dough that is smooth and elastic (6-8 minutes total). Cover, let rest for 10 minutes.

Grease a large round pizza pan. If desired, sprinkle with cornmeal. On a lightly floured surface, roll the dough enough to cover the pan, with some excess. Transfer to prepared pan. Build up edges slightly with excess dough.
Cover and let rise in a warm place until nearly double (30-45 minutes).
Meanwhile, preheat oven to 400. Prick dough with a fork. Bake 10-15 minutes or until light brown. Spread with pizza sauce, seasonings, cheese, and toppings. Bake about 10 minutes longer or until bubbly. Cut each pizza into 8 wedges.


Serves: 8

Sunday, November 29, 2009

Ice Cream Sandwich Dessert

I made this for dessert, when we had dinner with Nate's parents yesterday. It turned out GREAT! Very sweet; I couldn't have much.

Definitely something we would make again! The only problem is that is makes a 9x13 pan, and when you only have one piece at a time.... it's going to take us FOREVER to get through that pan! :) (Any volunteers to come help?)

Ice Cream Sandwich Dessert
(TOH)

17 miniature ice cream sandwiches, divided
8 Ounce caramel ice cream topping
24 Ounce frozen whipped topping, thawed
1/4 Cup chocolate syrup
8 Ounce candy bar, chopped

Instructions:
Arrange 14 ice cream sandwiches in an ungreased 13x9x2 pan. Cut remaining sandwiches in half lengthwise; fill in the spaces in the dish. Spread with caramel and whipped topping.
Drizzle with chocolate syrup. Sprinkle with chopped candy bar. Cover and freeze for at least 45 minutes. Cut into squares.


Serves: 15-18
Serving Size: 1 bar
Prep Time: 20
Total Time: 65 m


There were some changes I made, and some I will make for the next time. I already made the changes in the recipe, though.

Also... if you couldn't tell, there was no chocolate syrup in the pictures. This is because I completely forgot about the chocolate syrup. Oops. Oh well, we'll do it next time!


(Sorry for the 'final' picture... obviously, we'd had some, and the carmel is still pretty soft.)

Saturday, November 28, 2009

Makeover French Silk Pie

This was the other pie I made for Thanksgiving, which turned out very yummy also! This was at my little brother's request... I was planning on making pumpkin (which he doesn't like, and neither do I), so he asked for French Silk Pie.

It tasted great, but was an absolute pain to make! I'm assuming that I cooked it too long (when waiting for the bubbles to appear; see instructions). I thought for sure I ruined it, but I didn't. :)

Makeover French Silk Pie (TOH)


pastry for single-crust pie (9")
1 1/2 Teaspoon unflavored gelatin
1 1/4 Cup cold milk, divided
2/3 Cup sugar
1/4 Cup cornstarch
1/4 Cup baking cocoa
3 egg yolks
3 Tablespoon butter
2 Teaspoon Vanilla
1 1/2 Cup whipped topping
chocolate curls, optional

Instructions:
Line a 9” pie plate with pastry; trim and flute edges. Line pastry shell with a double thickness of heavy-duty foil. Bake at 450 for 8 minutes. Remove foil; bake 5 minutes longer. Cool on a wire rack.
In a small heavy saucepan, sprinkle gelatin over 1 cup milk; let stand for 1 minute. Cook over medium-low heat until bubbles form around sides of bowl. Combine egg yolks and remaining milk; whisk into sugar mixture until blended.
Add a small amount of hot milk mixture to sugar mixture; return all to the pan, whisking constantly. Whisk vigorously over medium heat.
Add a small amount of hot milk mixture to sugar mixture; return all to the pan, whisking constantly. Whisk vigorously over medium heat as mixture begins to thicken (mixture will become very thick). Bring to a boil; whisk 2 minutes longer. Remove from the heat; whisk in butter and vanilla.
Transfer to a large metal bowl. Lightly coat waxed paper with a cooking spray; press onto surface of sugar mixture. Refrigerate for 45-60 minutes or until mixture reaches 80 degrees.
Beat the cocoa mixture on high speed for 3-4 minutes or until smooth and glossy, scraping sides of bowl occasionally. Fold in whipped topping. Spread evenly into crush. Refrigerate for 2 hours. Garnish with chocolate curls if desired.


Serves: 8
Serving Size: 1 slice
Yields: 1 pie

Calories: 322
Cholesterol: 97 mg
Fat: 16 g
Saturated Fat: 9 g
Protein: 4 g
Carbohydrates: 40 g
Sodium: 167 mg
Fiber: 1 g


Go here for the recipe I use for pie crust, and for what to do with any extra crust!

I hope everyone had a great Thanksgiving! Any interesting recipes/stories to share?

Friday, November 27, 2009

Perfect Pumpkin Pie

First of all, let me say that I've never made a pie like this before. (Really, nothing similar, other than cheesecake & refrigerate-only pies!) I don't even like pumpkin pie.

But apparently, this turned out great! Mom, Dad, and Nathan loved it. (Kyle and I don't like pumpkin pie, and that's everyone that was there for Thanksgiving.)

It was incredibly easy to make!

Perfect Pumpkin Pie
(TOH)


15 Ounce can pumpkin
14 Ounce sweetened condensed milk
2 Large eggs
1 Teaspoon ground cinnamon
1/2 Teaspoon ground ginger
1/2 Teaspoon ground nutmeg
1/2 Teaspoon salt
9" unbaked pie crust

Instructions:
Heat oven to 425. Whisk pumpkin, sweetened condensed milk, eggs, spices, and salt in medium bowl until smooth. Pour into crust.
Bake 15 minutes. Reduce oven temperature to 350; bake an additional 35-40 minutes or until knife inserted 1” from crust comes out clean. Cool. Garnish as desired.

Serves: 8
Serving Size: 1 slice
Yields: 1 pie
Prep Time: 15
Cook Time: 50
Total Time: 65


Go here for the recipe I use for pie crusts, and to see what to do with the extra crust! :)

Any interesting stories/recipes for Thanksgiving?

Thursday, November 26, 2009

Something to be Thankful For

This Thanksgiving, my family has a lot to be thankful for.

We all have homes, food to eat, clothes to wear, and most of all--each other.

Aunt Joy is recovering from her surgery.

My Dad is alive and well after his accident, a year ago today.

My brother is finally married, to an amazing woman!

Every year, we still get the opportunity to get together as a large group, and see the whole family. (Even though we can't all make it every year, we have the opportunity.)

My in-laws are healthy, and we all got together as a family to celebrate my nephew's birthday last weekend.

I have a wonderful nephew & niece, who are happy and healthy. (And oh-so-adorable.)

And life is just good!


Happy Thanksgiving to you all!

Tuesday, November 24, 2009

What to Do with Extra Pie Crusts

It's nearly Thanksgiving. You are making your pies and -gasp- there is extra crust! What do you do? (Ignoring my over-dramatic-ness, of course).

You make these:
Mickey's Amazing Blackberry Tarts


This is something I learned from my Grandma. Whenever she had extra pie crust and I was over, she would let me have the extra and we would make 'blackberry pie.' We would simply take the extra dough, put it into a muffin tin, and fill with blackberry jam. (Homemade blackberry jam.... not that anyone would ever buy the store-bought kind. Silly people.) Then, bake until the crusts look golden brown, probably 10-15 minutes.

When these came out of the oven, Nathan & I both burned our tongues. Quite badly actually, but it was SO worth it.


Obviously, there can be a lot of variation with these. Different fillings, add a topping, don't use the muffin tin, etc. This was just what we did tonight.


This is the recipe I use for pie crust...


Pastry for Single-Crust Pie
(Better Homes and Gardens New Cookbook)

1 1/4 Cup all-Purpose flour
1/4 Teaspoon Salt
1/3 Cup shortening
4-5 Tablespoon cold water

Instructions:
1. In a medium bowl stir together flour and salt. Using a pastry blender, cut in shortening until pieces are pea size.
2. Sprinkle 1 tablespoon of the water over part of the flour mixture, gently toss with a fork. Repeat moistening flour mixture, using 1 tablespoon of the water at a time, until all the flour mixture is moistened. Form pastry into a ball.
3. On a lightly floured surface, use your hands to slightly flatten pastry. Roll pastry from center to edges into a circle about 12 inches in diameter.
4. Wrap pastry circle around the rolling pin. Unroll into a 9-inch pie plate. Ease into pie plate without stretching it.
5. Trim pastry to 1/2 inch beyond edge of pie plate. Fold under extra pastry. Crimp edges as desired. Do not prick pastry. Fill and bake pastry as directed in recipes.

Yields: 1 pie crust

Calories: 140
Cholesterol: 0 mg
Fat: 9 g
Saturated Fat: 2 g
Protein: 2 g
Carbohydrates: 14 g
Sodium: 73 mg
Fiber: 0 g

Sunday, November 22, 2009

Happiness = Cheesecake...or, how my husband fell in love with me

Have you heard the saying that the quickest way to a man's heart is through his stomach?

Yeah. This is how I got Nathan to fall in love with me.

So, a few years ago, I was dating this guy. Really cute, great guy. I really wanted to impress this great guy and do something nice for him, since he was always so sweet to me. I discovered that he likes cheesecake, so I thought "hey! That should be easy to make. I'll do that for him!"
I found a recipe, then asked my mama what in the world a springform pan was, and if we had one. Long story short, we didn't have one, I didn't want to buy one, so I found another recipe.

This is now the recipe that Nathan always requests for birthdays, etc. Along with everyone else in my family. And his family.


Cheese Cake
(Recipes to Remember from McLachlan Family & Friends)

(Yes, that is the only picture I have of the cheesecake. I forgot to take another one, OK? Just imagine it without the purple gel frosting and the dino candles. And the person who makes a crack about the handwriting never gets cheesecake again. Ever.)

19 Ounce cream cheese, softened
1 Cup sugar
1/4 Teaspoon Vanilla
3 eggs
1 Cup sour cream
2 graham cracker pie crusts (9" each)
cherry pie filling, if desired

Instructions:
Cream the cheese together. Add sugar; cream together. Add vanilla and eggs. Cream together. Add sour cream. Pour into crusts. Bake for 1 hour at 300 or until center is firm. Top with cherry pie filling, if desired.


Note: You can also add 2 tsp lemon peel. If you do, add with the vanilla and eggs. I just prefer not to most of the time.


Serves: 16
Serving Size: 1 slice
Yields: 2 cheesecakes
Prep Time: 20
Cook Time: 1 hr
Total Time: 1hr 20m


This was actually done for my nephew's birthday. (Happy early birthday, Nicholas!)
(Just look at how happy he is, eating his birthday cheesecake! His daddy and uncles are teaching him right. Cake? Psh! Cheesecake is way better!)


So.... 5 years later, Nathan still loves me. :) Granted, that may be more than just the cheesecake. You never know though. ;)

Saturday, November 21, 2009

Raspberry Sorbet

This is something I made awhile ago, expecting it to be great AND easy.

Well, at least it was easy to make.

I thought it was just too sweet. I had a bite or two, but most of it went to waste. Nate liked it well enough, though.

Next time... maybe less confectioner's sugar? Not sure what could be done to this without screwing it up. As it was, it took FOREVER to be frozen enough. (That seems to happen with everything.... maybe it's just my freezer.)


Raspberry Sorbet
(Cooking for Two)

4 1/2 Teaspoon lemon juice
1 1/4 Cup fresh/frozen unsweetened raspberries
3/4 Cup confectioner's sugar

Instructions:
In a food processor, combine all ingredients; cover and process until smooth. Pour into two dessert dishes. Cover and freeze for one hour or until edges begin to firm. Remove from the freezer 15 minutes before serving.

Serves: 2
Serving Size: 1/2 cup
Yields: 1 cup

Calories: 216
Cholesterol: 0 mg
Fat: 0 g
Saturated Fat: 0 g
Protein: 1 g
Carbohydrates: 55 g
Sodium: 1 mg
Fiber: 5 g

The picture is really a 'before' picture... I put it all in one bowl, then transferred it to different bowls before putting it in the freezer. Just forgot to take a frozen picture... oops. :)


For tomorrow's post.... CHEESECAKE! :)

Friday, November 20, 2009

Chicken Veggie Soup With Dumplings

Chicken Veggie Soup With Dumplings
Betty Crocker

2 Cup cut-up cooked chicken
4 Cup chicken broth
1 Teaspoon Parsley
Dash Thyme
2 Clove Garlic
12 Ounce frozen mixed veggies, thawed and drained
1 Cup Bisquick
1/3 Cup Milk

Instructions:
In a 3-qt saucepan, heat all ingredients except Bisquick and milk to boiling, stirring occasionally.
In a small bowl, stir bisquick and and milk with fork until soft dough forms. Drop dough by teaspoonful into boiling soup. If dumplings sink into soup, careful bring them to top of broth using slotted spoon. Reduce heat to medium low.
Cook uncovered for 10 minutes. Cover and cook 15 minutes.

Serves: 6
Serving Size: 1 cup


For my first time making a soup with dumplings, I was pretty excited at how well this turned out. Very yummy!


Sorry for the lack of pictures... I totally forgot. You'll just have to picture its yummy-ness. :)

Thursday, November 19, 2009

Peanut Butter Shakes

This is quite possibly the most amazing recipe I've ever tried. And, of course, it was super easy.

However, it was also so rich that I couldn't finish mine. (Nate had no trouble, of course!) ;)

The only thing I would do differently, is to possibly add a few less PB cups. Or maybe play with it... add Nutella instead of PB, etc! I haven't experimented, but I imagine this would be a very versatile recipe.


Peanut Butter Shakes
(Cooking for Two)

1 1/2 Cup vanilla ice cream
12 miniature peanut butter cups
1/4 Cup milk
3 Tablespoon creamy peanut butter

Instructions:
In a blender, combine all ingredients; cover and process for 1-2 minutes or until blended. Pour into chilled glasses; serve immediately.

Serves: 2
Serving Size: 1 shake

(And just look @ how happy my hubby looks here!)

Wednesday, November 18, 2009

Biscuit Pizza, & Muddy Buddies!

Last night we tried this new recipe for Biscuit Pizza.... very yummy! We would DEFINITELY make some changes for next time, however! I made some changes initially, but here is the recipe I used last night:

Biscuit Pizza
(Home Cooking)

1 1/2 Pound ground beef
15 Ounce pizza sauce
12-17 Ounce buttermilk biscuit dough
1 1/2 Cup shredded mozzarella cheese
1 Cup shredded cheddar cheese
2 Teaspoon pizza seasonings

Instructions:
Preheat oven to 400 degrees. Grease a 13x9” pan. Brown and drain beef. Stir in pizza sauce.
Pull each biscuit in half, press into prepared pan to cover bottom and up sides slightly. Top with beef mixture. Sprinkle with pizza seasoning, or other seasonings of choice. Bake, uncovered, for 10-15 minutes.
Sprinkle with cheeses. Bake 5-10 minutes longer or until cheese is melted. Let stand 5 minutes before serving.

Serves: 6-8
Prep Time: 15
Cook Time: 15
Total Time: 30


The picture doesn't accurately represent how it tastes! It is very yummy, just doesn't look so great.

Differently for next time, we would cut out the burger, and make it more pizza-ish. (Ham, pepperoni, etc.) Maybe cut down on the cheddar, too. That was interesting, but overall, it took away from the pizza flavor.


I also made Muddy Buddies last night... and the girls at work were pretty happy with me today. :)

Muddy Buddies
(My Mama... who gets the recipe from the Chex box)

9 Cup Chex
1 1/2 Cup Semisweet chocolate chips
3/4 Cup peanut butter
1/4 Cup margarine/butter
2 Tablespoon margarine/butter
1 1/2 Teaspoon Vanilla
2 Cup powdered sugar

Instructions:
Pour cereal into a large bowl, set aside. In a large bowl, combine chocolate chips, peanut butter, and margarine. Microwave until smooth, stir in vanilla. Pour chocolate mixture over cereal, stirring until all pieces are evenly coated.
Pour cereal mixture into a large container with powdered sugar. Shake until all pieces are well-coated, spread on waxed paper to cool.
Sprinkle with extra powdered sugar, if needed.


I do make them a little different than my mama... I add more chocolate/peanut butter mixture, because I have the hardest time getting the darn things coated. Oh well, they turn out fine anyways!


(Lack of pictures is largely because I've been lazy about it lately, even after I got a new battery. Oh well.)

Monday, November 16, 2009

Parmesan Herb Loaf, & happy news!

Very exciting news!!! My aunt is out of the hospital, and doing well at home!! Not much else to say about that... other than Thank God!! :)


I tried this when one of Nate's friends was visiting--and both guys liked it! (I did too, of course.) I played with the recipe a little already, but am pretty pleased with it. It's very interesting, and moist. And SUPER easy to make! I came across the recipe, thought it looked interesting, went to the kitchen, and not even 15 minutes later it was in the oven. It helps that all the ingredients are things we always have on hand!

We dipped some in olive oil/parmesan seasoning mix, but not necessary-it was great without it.

Parmesan Herb Loaf
(TOH)


1 1/4 Cup all-Purpose flour
3 Tablespoon grated parmesan
1 Teaspoon grated parmesan
1 1/2 Teaspoon Sugar
1/2 Teaspoon onion powder
1 1/4 Teaspoon Italian seasoning, divided
1/2 Teaspoon baking soda
1/4 Teaspoon Salt
1/2 Cup sour cream
2 1/2 Tablespoon Milk
4 1/2 Teaspoon butter, melted
1 egg white, lightly beaten

Instructions:
In a small bowl, combine the flour, 3 tbsp Parmesan, sugar, onion, 1 tsp Italian seasoning, baking soda, and salt. In another bowl, combine the sour cream, milk, and butter. Stir into dry ingredients just until moistened.
Turn onto a floured surface, adding more flour if needed. Knead for 1 minute. Shape into a round loaf, place on a baking sheet covered with cooking spray. Cut a 1/4" deep cross into the top of the loaf.
Brush with egg white. Sprinkle with remaining cheese and Italian seasoning. Bake at 350 for 30-35 minutes or until golden brown. Serve warm.


Serves: 4
Serving Size: 1/4 loaf
Yields: 1 loaf
Prep Time: 15
Cook Time: 30
Total Time: 45

Calories: 257
Cholesterol: 26 mg
Fat: 9 g
Saturated Fat: 6 g
Protein: 9 g
Carbohydrates: 35 g
Sodium: 446 mg
Fiber: 1 g

(Again, very few pictures, this was when the camera battery was dying.)

Friday, November 13, 2009

Lasagna Roll-Ups: My Way!

Another post for the day, to make up for the one I missed yesterday. :)

This recipe is a mixture of a lasagna roll-up recipe I saw somewhere, and the recipe I learned from my mama & grandma. And... the small touches I've added! :) Enjoy!

Lasagna Roll-Ups


15 lasagna noodles
1 Pound ground burger
1 Container pasta sauce
2 cloves garlic, minced
1/2 small onion, sliced into small pieces
2 Teaspoon Italian seasoning, or various similar spices
1 Package ricotta cheese
1 Egg
1/3 Cup Parmesan
4-5 cups mozzarella cheese, shredded
Parmesan, if desired
Italian seasoning, if desired

Instructions:
Cook pasta according to package directions; drain well. Seperate noodles right away to keep from sticking.
Mix ricotta, egg, and 1/3 cup parmesan in a bowl, set aside.
Meanwhile, in a large skillet, cook meat through. Add onion and garlic when meat is almost cooked. When cooked, add pasta sauce, keep on low or medium low to warm through.
Lay out 3-4 lasagna noodles on clean tabletop or cutting board. Spread small amount of ricotta mixture on each, then meat mixture, then sprinkle with mozzarella. Roll up each noodle carefully, then lay seam side down in a 13x9 pan. Repeat process for all 15 noodles.
Cover with remaining meat sauce and mozzarella. Sprinkle with more parmesean and Italian seasoning, if desired.
Bake at 400 for 15 minutes or until heated through.

Serves: 6
Prep Time: 25
Cook Time: 15
Total Time: 40
(Lack of pictures due to lack of a camera battery.)

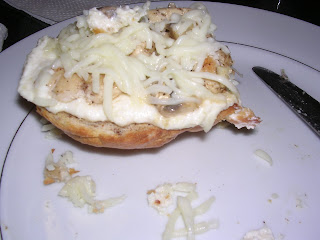
Chicken Alfredo Stromboli, update on life

So... why no post yesterday? Well, yesterday was quite possibly the most stressful day in the life of my entire family. My aunt Joy (second mom, basically) had a serious surgery, which did not go as planned (to say the least). She is doing well right now, but last night was a little stressful, so no post. No real dinner either, just munching while waiting for updated phone calls.
--Additional prayers are always welcome, of course!--

Here is something from the other day.....


I got this original recipe from Cooking for Two, but have made some changes. The stats about the recipe are according to the original, so they are not entirely accurate. Sorry. :)

I think this would qualify as one of Nate's favorite recipes! It has an interesting taste, and VERY filling. I usually don't finish my portion of it--Nate has to. :)

Chicken Alfredo Stromboli
(Cooking for Two)


1/2 Loaf Italian bread
6 Ounce boneless skinless chicken breasts, cubed
1 Teaspoon olive oil
4 Teaspoon butter, softened, divided
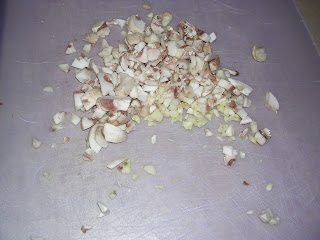
1/2 Cup mushroom stems and pieces, finely chopped
1 Clove Garlic, minced
Dash Salt
1/4 Teaspoon Pepper
1/4 Cup sour cream
1/4 Cup Parmesan
1 Cup shredded mozzarella cheese

Instructions:
Place bread, cut side up, on an ungreased baking sheet. Cook at 350 for 2-3 minutes or until lightly toasted; set aside.
In a small skillet, saute chicken in oil and 1 tsp butter until juices run clear; drain. Add the mushroms, salt, garlic, and pepper; cook for 1-2 minutes or until heated through.


In a small bowl, combine the sour cream, Parmesan, and remaining butter; spread over bread halves.
Top each with 1/2 of the of the chicken mixture. Sprinkle with mozzarella. Bake for 1-2 minutes or until cheese is melted.

Serves: 2
Calories: 613
Cholesterol: 95 mg
Fat: 26 g
Saturated Fat: 12 g
Protein: 38 g
Carbohydrates: 58 g
Sodium: 1249 mg
Fiber: 5 g

Thursday, November 12, 2009

Judi's Crab Quiche

The first time I have ever had crab quiche was when a co-worker, Judi, made it for us at work. And... I was hooked! I love this recipe--for the longest time, I was using a different recipe, because I had lost this one. I was so excited when I found it again! Now it's in Recipe Manager, so I don't have to worry about not having it. :)
Unfortunately, my dear hubby is not so fond of crab quiche, so I don't get to have it that often. :(

Judi's Crab Quiche
(Judi)


6 Ounce imitation crab meat, flaked
10" pastry shell
8 Ounce swiss cheese
1 Tablespoon Flour
4 eggs, beaten
1 1/2 Cup light cream
1 Tablespoon lemon juice
1/2 Teaspoon Salt
1/4 Teaspoon Worcestershire sauce

Instructions:
Bake pie shell for 6 minutes at 375 and set aside.
Cut crab meat into small pieces, then combine with Swiss cheese and flour. Turn into pie shell. Beat together eggs, cream, lemon juice, salt, and Worcestershire sauce.
Pour over cheese mixture. Bake at 375 for 40-45 minutes or until knife inserted in center comes out clean. Let cool for at least 5 minutes before serving.

Enjoy. :)

Serves: 6
Serving Size: 1 piece
Yields: 1 quiche

Prep Time: 20
Cook Time: 40
Total Time: 1 hr

Pastry for Single-Crust Pie
(Better Homes and Gardens)

1 1/4 Cup all-Purpose flour
1/4 Teaspoon Salt
1/3 Cup shortening
4-5 Tablespoon cold water

Instructions:
1. In a medium bowl stir together flour and salt. Using a pastry blender, cut in shortening until pieces are pea size.
2. Sprinkle 1 tablespoon of the water over part of the flour mixture, gently toss with a fork. Repeat moistening flour mixture, using 1 tablespoon of the water at a time, until all the flour mixture is moistened. Form pastry into a ball.
3. On a lightly floured surface, use your hands to slightly flatten pastry. Roll pastry from center to edges into a circle about 12 inches in diameter.
4. Wrap pastry circle around the rolling pin. Unroll into a 9-inch pie plate. Ease into pie plate without stretching it.
5. Trim pastry to 1/2 inch beyond edge of pie plate. Fold under extra pastry. Crimp edges as desired. Do not prick pastry. Fill and bake pastry as directed in recipes.

Yields: 1 pie crust

Calories: 140
Cholesterol: 0 mg
Fat: 9 g
Saturated Fat: 2 g
Protein: 2 g
Carbohydrates: 14 g
Sodium: 73 mg
Fiber: 0 g

Wednesday, November 11, 2009

Veteran's Day


Today is Veteran's Day.


Today is a day for us to mourn the soldiers we've lost, and give thanks for their sacrifice.
(Though for those who've lost someone, this is not something that can ever be forgotten.)


Today is a day for us to thank those soldiers who gave something of themselves for our country.
(Even though we should be doing this every day.)


Today is a day that we acknowledge the difference these amazing men and women have done for our country.
(While we may take it for granted on other days.)


So for Veteran's Day 2009, let's make a promise to ourselves: to always remember those who gave their lives for their country, to honor their families, to thank a veteran whenever you see one, and to be thankful for the wonderful country we live in.


Today is a day to remember, celebrate, cry, smile.... today is Veteran's Day.
(Have you hugged a hero today?)


While I can't hug each and everyone veteran... I can send you hugs through here. We love all of you, thank you for all you've done!


Extra hugs to Bill Lee (awesome dad-in-law), Jim Head (the best Grandpa in the world), and BJ Lee! (my super amazing brother-in-law!)

Monday, November 9, 2009

Cheesecake Brownies

This is proof of my mother-in-law's amazingness. Try these brownies, and you will agree.
The problem is that these things REALLY aren't good for you. But we'll just ignore that, OK? :)
I made these recently for a party we went to, and then again tonight for my little brother--he got a Student Athlete award at his high school, for his grades & football. Of course, I was super proud of him, so I offered to bake for him-this is what he asked for. :)

Cheesecake Brownies
Sue Lee


1 cake mix (Devil's food or dark)
2 Eggs
1 stick Butter
8 Ounce cream cheese, softened
1 Teaspoon Vanilla
1 Can sweetened condensed milk
milk chocolate chips, optional

Instructions:
Stir cake mix, 1 egg, and butter together until crumbly. Save one cup, place rest in bottom of greased 9x13 pan.

Mix together cream cheese, 1 egg, vanilla, and milk until creamy. Pour on top of brownie mix. Crumble cup of saved brownie mix on top. Add chocolate chips, if desired.


Bake at 350, for 30 minutes, or until cream cheese sets and edges golden.

Prep Time: 15
Cook Time: 30
Total Time: 45